RAMWorks IIII Kit: Difference between revisions
| Line 61: | Line 61: | ||
== Options == | == Options == | ||
The RAMWorks IIII Kit has the same rear RGB option headers the AE RAMWorks III card does. The front headers however have been removed since the card is already at 4Megs. Any standard RGB or | The RAMWorks IIII Kit has the same rear RGB option headers the AE RAMWorks III card does. The RAMWorks III style front option headers however have been removed since the card is already at 4Megs. Any standard RGB, VGA, or other option that works on a standard AE RAMWorks III card will work on all versions the RAMWorks IIII Kit cards. | ||
Here are some example pictures of the VGA option from A2Heaven | Here are some example pictures of the VGA option from A2Heaven installed on a RAMWorks IIII Kit v1.0 card. | ||
<gallery class="center" heights=200px widths=250> | <gallery class="center" heights=200px widths=250> | ||
File:RW4_Kit_-_Plamen_VGA_Adapter_pic1.jpg | File:RW4_Kit_-_Plamen_VGA_Adapter_pic1.jpg | ||
Revision as of 13:52, 17 August 2017
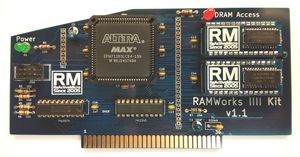
The RAMWorks IIII Kit is a user assemblable project based on the AE RAMWorks III card. The design allows for 4Megs of AUX RAM in the IIe as compared to the 3 Meg limit on the RAMWorks III.
It was conceived, created, and designed by Henry of ReActiveMicro and released for sale to the Apple II Community on June 10th, 2016. The original PCB bore the "UM" Ultimate-Micro logo till it's rerelease in 2017. The project was technically a collaborative effort with UltimateApple2.
Project Status: Complete. In production. Actively sold by ReActiveMicro.
Project License: ReActiveMicro Open Source license.
Support: Post on the Discussion page (link above) or email ReActiveMicro Support.
Sales: Visit the ReActiveMicro Store.
History
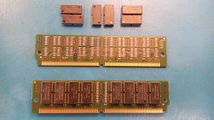
In December 2015 Henry had an idea to make a “kit” form of the RAMWorks III card but with 4Megs of RAM. This project would accomplish several goals. One is to move the RAMWorks design from 256k x 1bit DRAMs to more economical and more dense options such as those used on the 8Meg RAM Card project (4Meg x 4bit). The project would also be the starting “proof of concept” design for the RAMWorks Ultimate project which would be 16Megs and have built in RGB - as a "fully loaded" RAMWorks III from AE was offered. Since the project is planned to be in kit form, this allow it to be sold for use at the SolderFEST session at KFEST 2016and thus generate funds and PR.
The RAMWorks IIII Kit v1.0 project was released for sale to the Apple II Community on June 10th, 2016. At the date of release ReActiveMicro was still in the process of setting up and testing their new Store and Wiki. So the project became a "collaborative" release with UltimateApple2 in order to have Kits available and for delivery at KFEST 2016.
Up till August 2016 the Ultimate-Micro.com Store was the only vendor who distributed the project. Then as part of ReActiveMicro.com's full return from hiatus with their new Store and Website release they took over sales and distribution to better serve and support the Apple II Community. At this time the PCB was also revised with the ReActiveMicro logo.
On May 20th, 2017 ReActiveMicro re-released the RAMWorks IIII Kit as v1.1 at a new lower price and with now matching SOJ to DIP Adapters. The v1.0 version had green Adapters and the PCB was blue. Now all parts are blue. The rerelease date could have been sooner however other projects took priority. Also, at this time no other vendor is offering a 'full card' solution. Kits will also be available once again for SolderFEST at KFEST 2017.
The Name: IIII vs. IV
Why “IIII” and not “IV”, or To V or Not To V: As in keeping with Roman tradition since Roman Numerals are used, the “IIII” is called “A Watchmaker’s Four”. Originally, it was common to use IIII to represent four, because IV represented the Roman god Jupiter, whose Latin name, IVPPITER, begins with IV. The subtractive notation which uses IV instead of IIII has become the standard notation only in modern times. Also we used IIII because it's easily recognizable as four. IV involves a little math. Yes, it's just one simple subtraction operation, but keep in mind that we have found there are people who place an order don’t even bother to read the item’s listing, and perhaps the RAMWorks IV would be confused as medical equipment and we would be responsible for a few Community member’s death.
Project Revisions
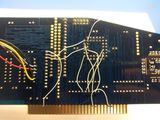
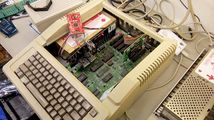
Alpha Version: Henry started development on January 29th, 2016 by creating an Alpha PCB layout based on the original RAMWorks III design by AE and combining the "Proof of Concept" and "Alpha" phases. We knew from experience with the IIgs 8 Meg RAM Card project and the datasheet of the proposed DRAM that it will easily emulate the older 256k DRAMs that were used on the original RAMWorks III, so we skipped the Proof of Concept phase. The Line Driver ICs were kept in the design as they are needed to drive the Apple II buses. However the rest of the RAMWorks III circuits would be moved in to a CPLD. Any changes or mods needed to the PCB could easily be made using flywires. Henry fully wired and assembled the Alpha boards as shown below.
- RAMWorks IIII Kit: Alpha
-
Alpha PCB
-
The RAMWorks IIII Alpha Proto - Testing 256k RAM
-
The RAMWorks IIII Alpha Proto - Rear
-
The RAMWorks IIII Alpha Proto, Installed in IIe, Connected to Logic Analyzer, Testing 4MB RAM
-
4Meg x 4bit DRAMs, Pulled From 72 Pin SIMM
Beta Version: While working on the Alpha design any issues found and corrected were added to this design. Layout was completed on May 22nd and PCBs were ordered. Any changes needed could be done within the CPLD, and all that was left to do is fully test the PCB. Assuming this PCB version worked it would be released for sale.
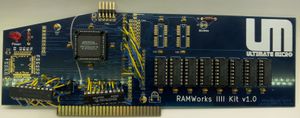
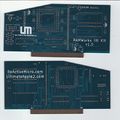
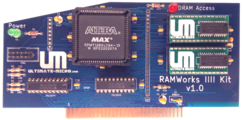
v1.0: The Beta version worked perfectly and the project was completed and released for sale to the Apple II Community on June 10th, 2016. These boards bare the "UM" Ultimate-Micro logo and the project was technically a collaborative effort with UltimateApple2 although all design work and testing was performed solely by Henry. You will notice the SOJ to DIP Adapters are a green color. This was due to the fact they came first and their use for this project was secondary.
- RAMWorks IIII Kit v1.0
-
v1.0 PCB
-
v1.0 PCB Assembled
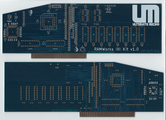
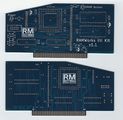
v1.1: This marks the project transitioning from an Ultimate-Micro "collaborative" project to a fully solo ReActiveMicro project. The RM logo was added to the front and rear of the PCB. Also the SOJ to DIP Adapters were recreated and updated to be of matching color and to bare the RM logo. The PCB also had the layout notes updated, but nothing major was changed about the design. It is the same layout as v1.0. The biggest change is now the project is Open Source under the ReActiveMicro Open Source license, and the JTAG parts are now standard as part of the kit with the hope to encourage buyers to tinker with the project on their own.
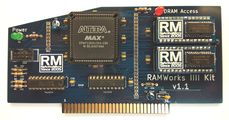
- RAMWorks IIII Kit v1.1
-
v1.1 PCB
-
v1.1 PCB Assembled
Options
The RAMWorks IIII Kit has the same rear RGB option headers the AE RAMWorks III card does. The RAMWorks III style front option headers however have been removed since the card is already at 4Megs. Any standard RGB, VGA, or other option that works on a standard AE RAMWorks III card will work on all versions the RAMWorks IIII Kit cards.
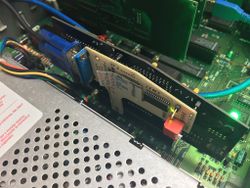
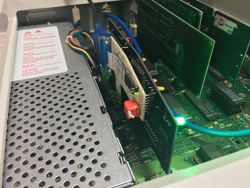
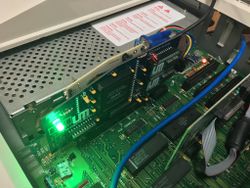
Here are some example pictures of the VGA option from A2Heaven installed on a RAMWorks IIII Kit v1.0 card.
Reviews
On June 19, 2016 Chris Torrence posted a review of the RAMWorks IIII Kit. He gives some very good feedback and shows his own assembly of the project.
On June 23, 2016 Joe Strosnider posted a review of the RAMWorks IIII Kit. He gives some very good feedback and shows his own assembly of the project.
Note: For a more "green footprint" assembly instructions are no longer included, but are available below. Also some parts now vary in color.
RAM Tester and RAM Disk Software
To test your RAMWorks IIII board we recommend the "RAMTEST" program on the Super AppleWorks Desktop Expander v5.3.1 disk image below.
To setup a RAM Drive and use you extra RAM in programs like Copy II + and AppleWorks then we recommend the "PRODRIVE.SYSTEM" program on the Super AppleWorks Desktop Expander v5.3.1 disk image below.
One of the unclaimed prizes however is a more customized tester. Please see the Unclaimed Prizes section.
Assembly Guide
Project Design Files
The following design files are released under the ReActiveMicro Open Source license.
Simple English - What you can and can't do: Software is under GPL affero version 3, OR commercial license. Please send us any changes you make or you can buy a commercial license if you don't want to release your changes. You are not allowed to clone and sell this project to others without approval.
The concept and desire behind wanting to be Open Source: ReActiveMicro endeavors to share knowledge and work with the Community without the worry of others taking this information and using it against us to compete. We do not wish to compete with others, and in return we wish the same respect be given. We hope by being Open Source we help spur on others to learn, improve our projects, and even create their own which ultimately benefits the Community. If these changes are impressive or unique in some way which adds value to a ReActiveMicro project then it is up to ReActiveMicro's discretion to offer rewards or incentives for work performed. We don't look to corner or dominate any markets, but hopefully create alliances and partnerships along the way to the benefit of the Community, and influence it's growth and health long after we are gone. To have someone value our work enough to credit or reuse it is what we consider the ultimate sign of respect and homage, and in a way a "geek" form of immortality. And to these people I personally thank you. - Henry
Current Unclaimed Prizes
We are currently offering prizes to the first people able to help us with the following items related to this project:
Custom RAM/Board Tester
This project would be a program which runs on the Apple IIe and allows for ID and testing of up to 16Megs of RAM.
The tests should be of an intensive nature and have a simple menu to allow the user to select part of RAM, all of RAM, and for single or repeat testing.
The program should also allow for testing of the RGB option which can be installed on to this board.
Reuse of existing AE code is allowed.
The ReActiveMicro logo and/or and website address should be displayed in the program.
Please be sure to credit yourself as author.
Edit ProDRIVE
ProDRIVE is software created by AE to allow for a RAMDisk to be created in the AUX RAM on the RAMWorks III board and clones. This software however has some issues in our opinion.
For one, when it loads it always defaults to /RAM when ONLY it is loaded by ProDOS. It would be nice if the "bye" screen went back to the volume from which ProDOS was loaded.
Another issue is ProDRIVE is 'reset' and it's contents are lost on a reset or warm reboot. It would be nice if this was corrected.
Size selection would be a nice feature. The user should be able to select how much RAM to use for ProDRIVE rather then it ALL be allocated.
Clock Driver
We can easily add a DS1215 Clock to this board. However there is no patch to allow ProDOS to know the clock is there. For this project you can assume the Clock on Data Bit 0. Write a patch program and send it to us. There is a known issue of AUX RAM being cached by accelerators. However all RAM may no be cached. Part of the project should be trying to overcome or account for this possible issue.
You can reuse the existing NSC patch program if desired.
The ReActiveMicro logo and/or and website address should be displayed in the program.
Please be sure to credit yourself as author.
Refresh Circuit
The current design works, however the DRAM Refresh Circuit could be better constructed to be more consistent in more situations. When using a Logic Analyzer you will see that for each /PHI1 cycle a refresh is performed. /CASEN is used as part of the trigger to generate a refresh, however this should not work consistently since /CASEN is low when copying or accessing a 3.5” Floppy using the 3.5” Drive Controller card for example. Other controller cards may cause the same condition. Some refresh cycles are missed however since the DRAM is 'over refreshed' this doesn't seem to cause any issues overall.
For this project you should devise a better refresh circuit which is more consistent.
LED Access Circuit
The current design works, however the access circuit is based on access to the A8 address line. This causes the LED to blink pretty well, but it could be done better.
New Ideas
We are always looking for new ways to improve this project and people to collaborate with. Please let us know of your ideas, send us schematics or files, or better yet show us how they would work on your own board and send us a video.
For completion of these projects you will receive payment, hardware, or discounts - whatever you prefer. Please contact us for more details if needed.
