POM1 Raspberrypi: Difference between revisions
Apple1Mini (talk | contribs) No edit summary |
Apple1Mini (talk | contribs) No edit summary |
||
| Line 93: | Line 93: | ||
POM1 source code: https://github.com/anarkavre/pom1 | POM1 source code: https://github.com/anarkavre/pom1 | ||
https://www.raspberrypi.org/ | https://www.raspberrypi.org/ | ||
Revision as of 15:33, 16 August 2020
This is a Wiki ReactiveMicro page to share the Raspbian Pom1, for all Raspberry pi Distribution. POM1 is an Apple 1 emulator and I have compiled it inside Linux to boot at startup in full HDMI screen. Some Raspberry pi can show a mouse pointer for less than a second on your screen before loading the POM1 emulator (on a Raspberry pi 4b the mouse remain visible, you can move it with your mouse device in a non visible screen area or dont connect any mouse in your usb port seeing Pom 1 Software dont need mouse.) I advise a 1 A+ Raspberry pi also Raspberry pi Zero works with it. Raspberry pi 4B has 2 HDMI ports one Full HDMI and one 4K, use the Full HDMI one to fill the full tv or monitor screen.
To install it, unrar it with winrar or similar program, then connect your preformatted SD card from 16gb or more and with win32DiskImager upload the image inside the SD. When ready connect it to Raspberry pi and after connecting to it Keyboard, HDMI cable and power supply give it current, wait some seconds a @ will appear.
INSTRUCTIONS
TO LOAD A MACHINE CODE PROGRAM (WOZ MONITOR) INSIDE POM 1 RASPBERRY PI: 1)Press CTRL - Q to exit from apple 1 to linux terminal 2)Write startx to enter Raspbian 3)Save from your usb pen to Desktop the .txt file with the apple 1 code you prefer (for example called NIM.txt) inside the / folder by writing in terminal before "cd Desktop" return then "sudo mv NIM.txt /" return. 4)Reboot the Computer and press CTRL - L to load the file and write his full name NIM.txt then select ASCII pressing 1 on your keyboard PRESS 1 for keyboard and return. 5)GO TO Apple 1 and write 4AFR retrun it will display the GAME.
TO LOAD A BASIC PROGRAM INSIDE POM 1 RASPBERRY PI: 1)Press CTRL - Q to exit from apple 1 to linux terminal 2)Write startx to enter Raspbian 3)Save from your usb pen to Desktop the .TXT file with the BASIC code you prefer inside the / folder by writing in terminal before "cd Desktop" return then "sudo mv AI.txt /". 4)Reboot the Computer 5)Write E000R in Apple 1 screen and press CTRL - L to load the file, write his full name AI.txt return, then select ASCII pressing 1 then 1 for keyboard and return. 6)Write RUN in Apple 1 screen, press return.
To shutdown the computer press CTRL-Q while in the apple 1 screen then write in the terminal command line sudo shutdown -h now and press return.
Pom1 is an Apple 1 emulator being ported to C from the original Java
version. It uses the Simple DirectMedia Layer library and works on most
platforms.
Options
Pom1 has many options to configure and utilize the emulator. They are accessed by Ctrl+<letter>. Some options also have corresponding command line parameters.
Option Letter Parameter Description
Load Memory L Load memory from a binary or ascii file. Save Memory S Save memory to a binary or ascii file. Quit Q Quit the emulator. Reset R Soft reset the emulator. Hard Reset H Hard reset the emulator. Pixel Size P -pixelsize <n> Set the pixel size (1 or 2). Scanlines N -scanlines Turn scanlines on or off (pixel size 2 only). Terminal Speed T -terminalspeed <n> Set the terminal speed (Range: 1 - 120). RAM 8K E -ram8k Use only 8KB of RAM or entire 64KB of RAM. Write In ROM W -writeinrom Allow writing data in ROM or not. IRQ/BRK Vector V Set address of interrupt vector. Fullscreen F -fullscreen Switch to fullscreen or window. Blink Cursor B -blinkcursor Set the cursor to blink or not. Cursor Block C -blockcursor Set the cursor to block or @. Show About A Show version and copyright information.
POM 1 Raspberry pi Operating System Download link (Don't bother the google ads that says WHOOPS! there was a problem with preview, click download to download it):
I and a friend have design and build a case similar to the one that fitted A**le Computer 1 in mid 70's, for Raspberry pi A+ to 4B. here is the link to the page where you can download the files to 3d Print it!
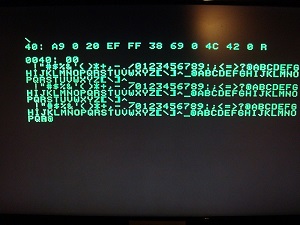
Running the Monitor:
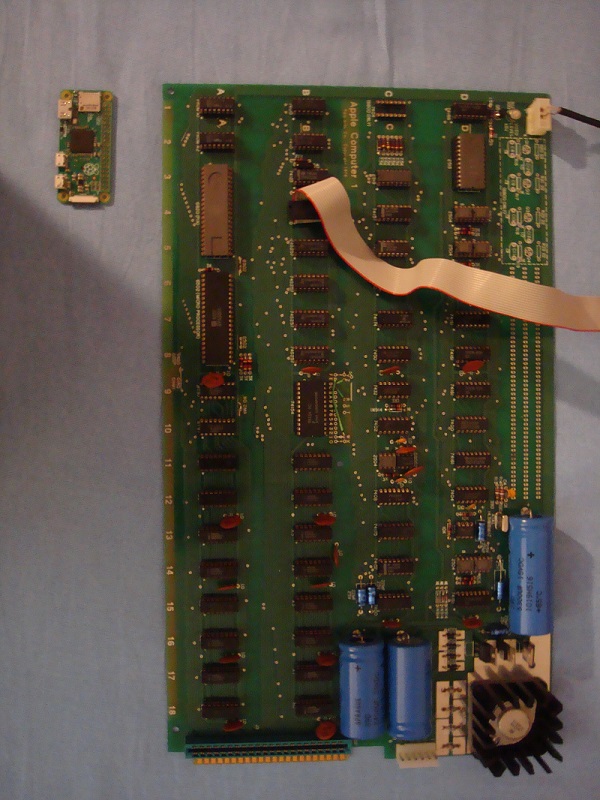
This is an example of how in 43 years the computers are miniaturized and also with the little effort i made is possible to have in a gum packet size computer an Apple 1 with my distro POM 1 in a Raspberry pi Zero for the price of 25$ complete with cables and SD you see on the top left of this picture, on the right an Apple 1 very similar Clone.
WE ARE NOT RESPONSIBLE FOR ANY DAMAGE MADE BY A WRONG INSTALLATION TO YOUR SD CARD AND TO ANY DAMAGE YOU MAKE TO YOUR RASPBERRY PI AND YOUR PERSON USING IT. THE OPERATIVE SYSTEM WAS TESTED ON MORE THAN ONE MODEL OF RASPBERRY PI AND WORKED
FINE.
By Toolkitman
POM1 source code: https://github.com/anarkavre/pom1 https://www.raspberrypi.org/

