Universal Enclosure PSU: Difference between revisions
No edit summary |
No edit summary |
||
| Line 30: | Line 30: | ||
* Step 2: Add the remaining side. Solder all joints well and add plenty of solder. The whole seem doesn't need to be soldered, but ever 2" / 5cm is a good idea. And be sure to solder where the corners of the panels meet. | * Step 2: Add the remaining side. Solder all joints well and add plenty of solder. The whole seem doesn't need to be soldered, but ever 2" / 5cm is a good idea. And be sure to solder where the corners of the panels meet. | ||
==History== | |||
When Henry created the [Universal PSU Kit] in 2015 he also started research in to what it would take to create a custom enclosure. The initial concept was going to be a full clone of what Apple Computer produced. However any metal enclosure about $1k or more for single proto units, and at least $85 per unit in quantities under 250 units. These prices meant either metal had to come down in price, or some other material would be needed. | |||
Henry then started to look in to 3D printing in conduction composites and even metabolized plastic. Although these did mostly work, the price was still very expensive and the metal coating in most cases wasn't very durable. Several hobbyist in the retro Community contacted Henry to possibly offer help, however all these offers ended in the same thing being learned - working in metal is very expensive. So Henry would need to find another option. | |||
In 2018 Ultimate Apple 2 completed their own project called the Ultimate Enclosure. It was fully metal and consisted of a case and a lid. The retail price was $95 and released on October 5, 2018. During this time Henry had been busy with other projects and didn't want to compete with Ultimate Apple 2, especially with the added risk with a large investment due to the cost of metal work. However stock of enclosures was single source and not always available, and the current design left some room for improvement. So Henry continued with research and ideas. | |||
Several ideas and materials were tested. Meters, fans, and kit ideas were all researched. In July 2020 an old CAD design was revised and a new proto completed and ordered. The new material allowed so low cost production that could be ordered factory assembled or in kits for end users to assemble. The cost was also a 10th of metal, and unlike metal allowed for parts to all be produced flat which would save in space with stock and shipping. | |||
Once the initial proto was assembled it was clear this concept was viable and allowed for simple changes and features to be added in the future with little or no costs for tooling, unlike metal. Meters and fans were added shortly after, and custom DC Output Cable designs were worked out to keep costs low and to allow maximum flexibility for the end user. | |||
Revision as of 13:20, 12 October 2020

The Universal PSU Enclosure is designed by [ReActiveMicro] to be an expensive PSU enclosure replacement and installed by the end user.
As the name implies, the enclosure supports the Apple II, II Plus, //e, IIGS, and most clones. It was conceived, created, and designed by Henry of ReActiveMicro and released for sale to the Apple II Community on date. It's a simple to assemble, fun kit for anyone who needs a new PSU for system missing one, wants to retire their old PSU while keeping it original, or for a decent all-in-one bench supply.
Product Status: Actively sold by ReActiveMicro.
Support: Post on the Discussion page (link above) or email ReActiveMicro Support.
Sales: Visit the ReActiveMicro Store.
Kit Assembly
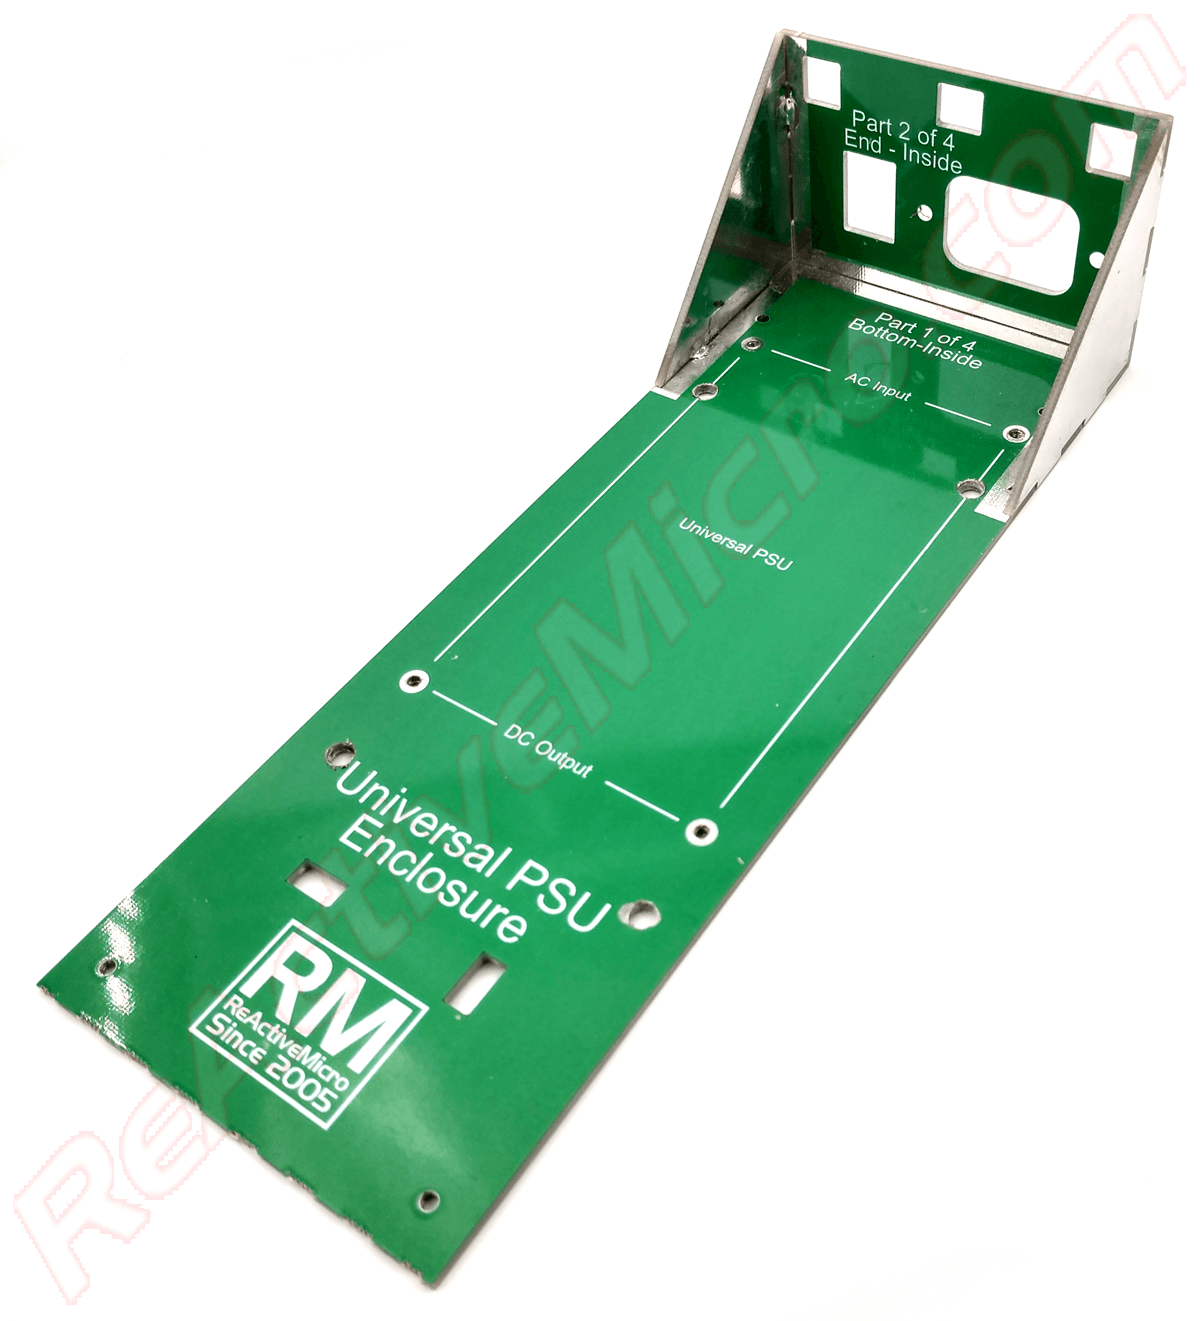
The kit comes as several panels which are soldered together. It's very simple and quick to assemble, like legos, and most users won't even need instructions. However with all our kits, we highly recommend at least skimming to quickly review.
- Step 1: Assemble the bottom and the sides. Simplest way to start is to hold the end panel and side panel to the bottom panel. This will form a stable triangle which can easily be tacked in to place with some solder. One in place you can add a thicker and longer bead of solder to add strength.
- Step 2: Add the remaining side. Solder all joints well and add plenty of solder. The whole seem doesn't need to be soldered, but ever 2" / 5cm is a good idea. And be sure to solder where the corners of the panels meet.
History
When Henry created the [Universal PSU Kit] in 2015 he also started research in to what it would take to create a custom enclosure. The initial concept was going to be a full clone of what Apple Computer produced. However any metal enclosure about $1k or more for single proto units, and at least $85 per unit in quantities under 250 units. These prices meant either metal had to come down in price, or some other material would be needed.
Henry then started to look in to 3D printing in conduction composites and even metabolized plastic. Although these did mostly work, the price was still very expensive and the metal coating in most cases wasn't very durable. Several hobbyist in the retro Community contacted Henry to possibly offer help, however all these offers ended in the same thing being learned - working in metal is very expensive. So Henry would need to find another option.
In 2018 Ultimate Apple 2 completed their own project called the Ultimate Enclosure. It was fully metal and consisted of a case and a lid. The retail price was $95 and released on October 5, 2018. During this time Henry had been busy with other projects and didn't want to compete with Ultimate Apple 2, especially with the added risk with a large investment due to the cost of metal work. However stock of enclosures was single source and not always available, and the current design left some room for improvement. So Henry continued with research and ideas.
Several ideas and materials were tested. Meters, fans, and kit ideas were all researched. In July 2020 an old CAD design was revised and a new proto completed and ordered. The new material allowed so low cost production that could be ordered factory assembled or in kits for end users to assemble. The cost was also a 10th of metal, and unlike metal allowed for parts to all be produced flat which would save in space with stock and shipping.
Once the initial proto was assembled it was clear this concept was viable and allowed for simple changes and features to be added in the future with little or no costs for tooling, unlike metal. Meters and fans were added shortly after, and custom DC Output Cable designs were worked out to keep costs low and to allow maximum flexibility for the end user.